Cortana Freezing Bug: How To Fix
On one of my home PC’s running Windows 10 I’ve experienced a peculiar bug after a recent update. The Cortana search function would freeze and disappear after typing more than one character in it. I use the search box in the taskbar to navigate to most applications in Windows. When this fails it has a considerable negative impact on my experience.
After the normal Google searching for the problem, the solution wasn’t too obvious to find. the Microsoft support forums try to make it easy to find your solution by hiding all replies to a problem that aren’t considered the best. Nonetheless, I found a solution on the Microsoft forums from a user Sappy00. The original forum post will be linked at the end of this post. I have simplified the user’s suggestion here:
How To Fix Cortana Search Freezing After Typing One Character
Step One: Create a Secondary User Profile
If you only have one user profile on your Windows 10 machine, or all users on your PC are currently effected by this bug, you will need to create a new user profile. To do so, you must open a command prompt window. Since you probably can not do this via the search box, execute a “ctrl+shift+esc” to open a task manager.
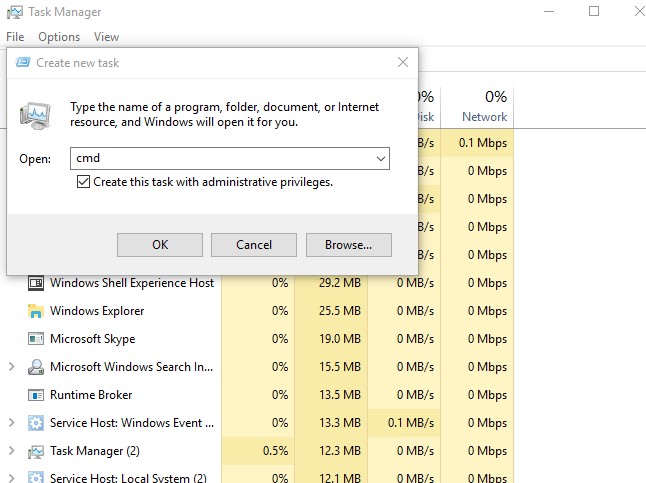
Once you have task manager open, navigate to File / Run New Task. In the “Run” box type “cmd” and check “Create this task with administrative privileges”.
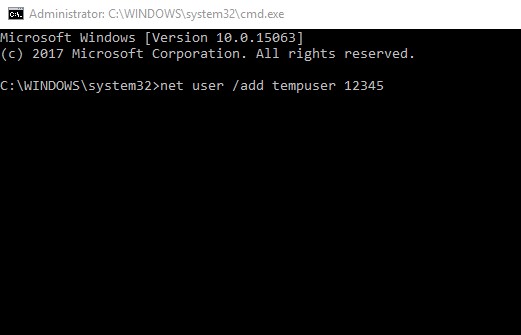
In the command prompt execute this command:
net user /add tempuser 12345
“tempuser” is your new user’s username. “12345” is the password. This is completely up to you, but in my case I plan on deleting this profile as soon as I’m done with this process.
Now that you have a fresh user profile created, it’s time for step 2.
Step Two: Copy New Files To Your Original User Profile
Log out of your effected user profile. At the log in screen you should see the user profile we have just created. Log into it now. This should take a minute or so depending on the speed of your machine.
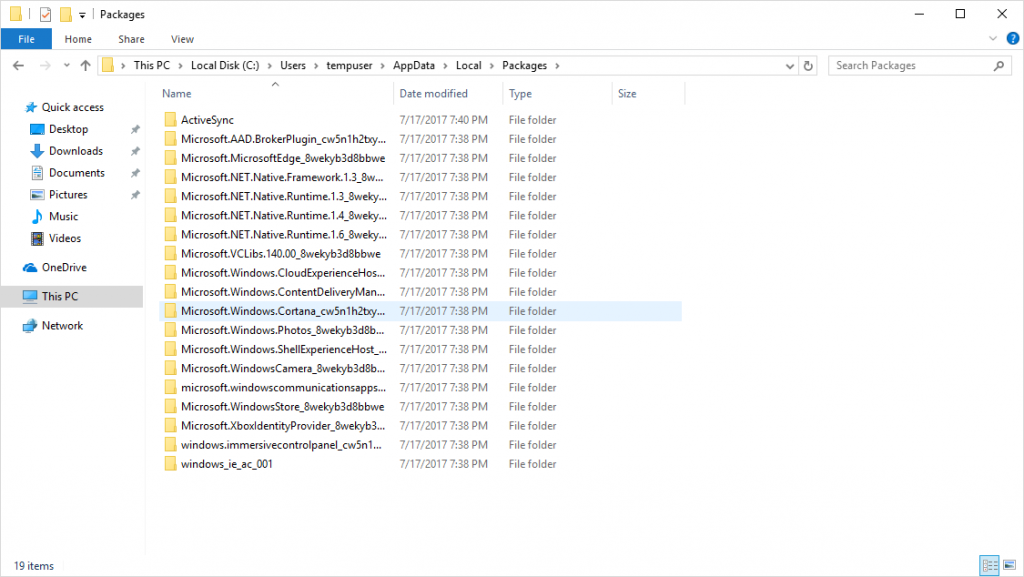
Once you are completely logged in, right click the start menu and select “File Explorer”. From here you will navigate to this folder:
C:\Users\tempuser\AppData\Local\Packages
(If you do this manually by clicking through the folders, you will need to enable view of Hidden items. To do this, click on View and check the box marked “Hidden items”)
In this folder you will find a folder named “Microsoft.Windows.Cortana_{random_string_of_numbers}”
Copy this folder. Now navigate to this same “Packages” folder in your original user profile where you are experiencing the bug.
Delete the “Microsoft.Windows.Cortana” folder in your original user profile folder and paste the one we copied from the new user profile’s folder. You will be told a couple items can not be copied, but you can skip all of these. These files were not important when I did this.
Once all of these files are copied over, you may now log out of the temporary user profile and back into your original profile. The issue should now be resolved. Don’t forget to delete your temporary user profile.
I adapted this solution from an answer on the Microsoft forums by a user named Sappy00. You can find the original answer here.